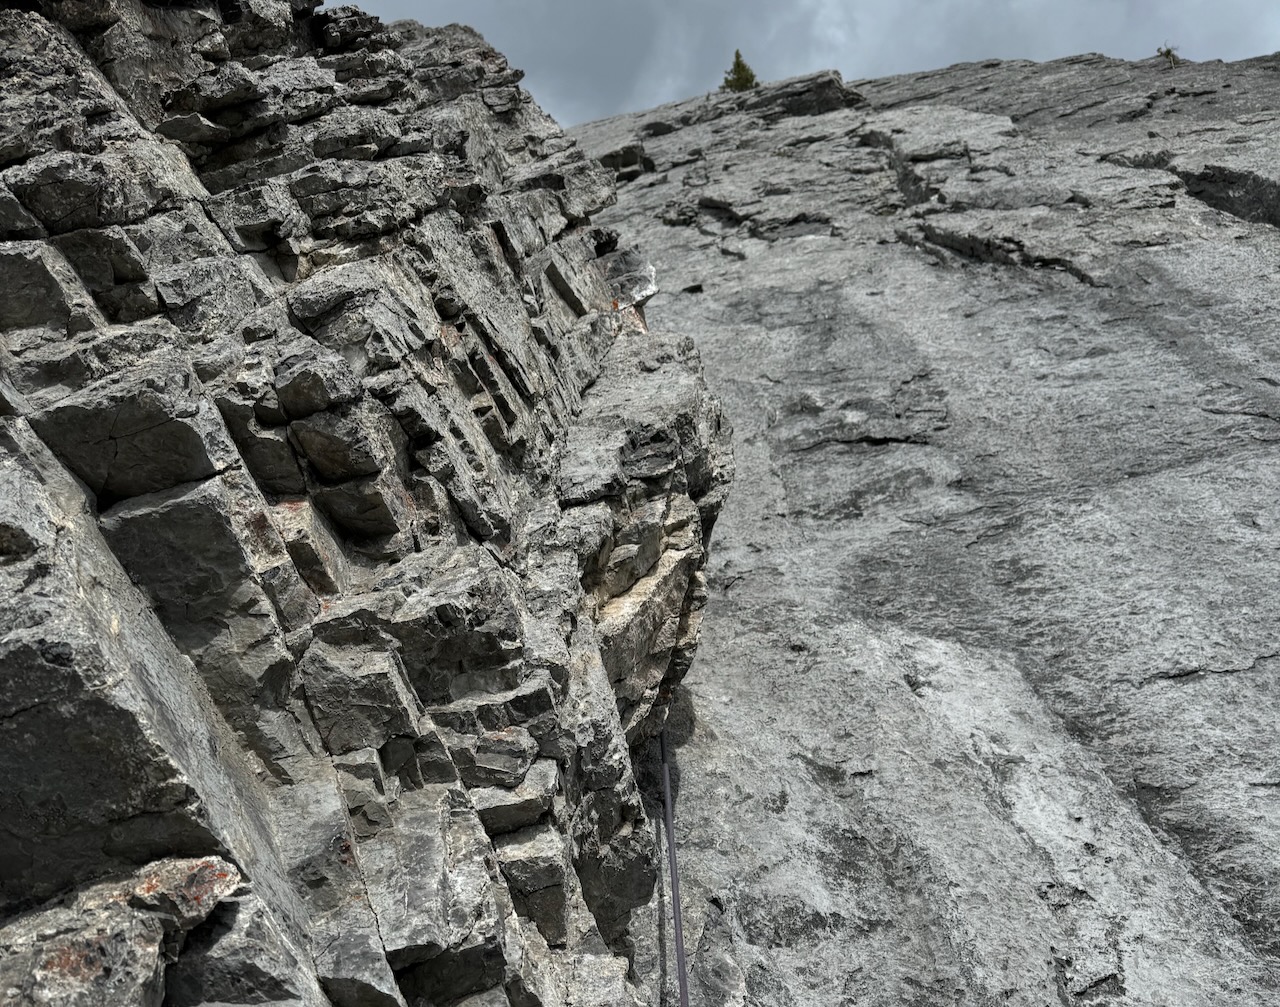
Escargot Corner is a moderate-grade trad multi-pitch climb that follows a long corner on a huge slab on Mount Norquay near the town of Banff. We climbed it on August 30, 2024.
Beta Summary:
- 5.7, 6 pitches. Some pitches are long – greater than 30 meters.
- Approach: 1.8 km, 578 meters total elevation gain, involves a lot of scrambling.
- Pro: all trad gear except anchors. There are no bolts and no fixed pro on the pitches except for one rusty piton on the third pitch.
- Anchors: All bolted.
- Gear: We used one set of cams with doubles up to 1.0. We brought a set of nuts but did not use them. We brought a dozen alpine draws and if I did this climb again, I would bring more, probably 14 or 15. Quickdraws would work for some of the placements as we didn’t need to extend them all.
- Ropes: We used one 70 meter rope.
- Descent: From the top, descend the ridge via 2 rappels, downclimbing and hiking down steep terrain.
There are lots of other sources of information about this route online. The most useful website we found was Searching for Dead Snails on Escargot Corner. It includes great advice on how to find the route and how to descend.
We also referred to photos and pitch descriptions in the guidebook Banff Rock by Chris Perry. Although this book was published in 2012, the information about each pitch of the route is still useful. If you can’t find a copy of the book, the pitch descriptions on Mountain Project are also pretty good.
Why We Chose This Climb
Being fairly new to Trad Climbing, we look for fun routes where we can practice our skills. We climbed Mother’s Day the week before and it went well. We wanted another moderate trad multi-pitch where we could practice our skills.
There is so much more to trad climbing beyond sport climbing. Placing our own protection, instead of clipping bolts, pushes us to think about when and where we need protection balanced with the availability of placements. Mother’s Day gave us many possible gear placements. Escargot Corner wasn’t quite as generous.
We chose Escargot Corner as our next climb because:
- the moderate grade – the hardest pitches are 5.7 so we thought we wouldn’t have to worry about technical climbing,
- it has bolted anchors so we didn’t have to build our own anchors (although we were prepared to, if needed),
- there is a fair amount of beta out there, for both the ascent and the descent, which helped us plan and prepare,
- it is a well-travelled route.
We found this climb challenging. The hardest pitches, Pitch 4 and Pitch 6, are rated 5.7 and we found them difficult for the grade. The climb was a lot more difficult than Mother’s Day, rated 5.6 except for the route finding which was easier on this climb. Escargot Corner follows a prominent corner and the route is more obvious than Mother’s Day.
The bright green line on this map shows our route, including the approach and descent, recorded on FATMAP.

The green dot at the bottom shows where we parked along the Trans Canada Highway.

Parking is in a gravel pull-out on the west-bound side of the highway. It is about 2 km west of the Banff Mount Norquay turn-off and just past the rest stop with outhouses on the other side of the road.
The Approach
The approach for this climb involves steep hiking and scrambling.

From the pull-out where you parked, hike west along the highway until you cross a small drainage. Then hike up the hill to reach a point where the fence has poles – this spot is easiest to climb.
Climb up and over – first climbing moves of the day!


Then cross the little drainage and hike up the other side.
A cairn shows the way.
A number of trails wind through the forest. Your goal is to go up, away from the highway, to attain the ridge crest. Note that Mount Norquay is comprised of two ridges. You want to be on the east ridge.
You will cross under some power lines. We took a trail that went directly under the structure in the photo that holds the lines up.


Above the power lines, a well-defined trail winds up the hillside.
At times, the trail splits. Ultimately, you need to head up toward the top of the ridge, seen in the distance.


Dan tackles a scrambling section.
There are several rocky steps to scramble up on your way up the ridge.
Steep trail breaks up the rocky steps.


Or maybe the rocky steps break up the steep trail.
Either way, you stay mostly on the ridge crest, gaining elevation quickly.
And then you get to a spot where the trail stops going up and drops down a little.
The trail continues through the trees and, though it seems unlikely from this perspective, it continues up the big rocky step in front of you.


Here Dan makes his way up the big rocky step.
At the top, a trail takes you through forest.


And you arrive at the big cairn.
This cairn on a flat spot on the ridge marks the point where the approach diverges from the descent. Up ahead, the descent trail comes down the ridge.
To continue the approach, leave the ridge top and drop down left.
Looking left into the trees at the trail that drops down to continue the approach.


At first, the trail drops down through the forest. Eventually, it curves around the mountainside to the base of the slab.
Continue along the trail at the base of the slab until you pass two bolts.

The bolt on the left marks the start of Escargot Corner. The bolt on the right marks the start of a different climb.

The Climb
As we looked up at the climb, we noticed a bolted anchor maybe 15 meters up and off to the left. It looked to be a bit off the route but we assumed this was the first anchor on the climb. We were wrong.
We should have known that if the first two pitches total 95 meters, as the guidebook says, this anchor would have to be too low. But we weren’t sure. We didn’t want to skip an anchor and then run out of rope.
The description on Mountain Project does say to climb past two bolted belays for the first two pitches. It’s not clear but maybe it means to climb past this first one and not use it. Or maybe means that both the belays for pitches 1 and 2 are bolted. Regardless, if I did it again, I would not use this anchor. We ended up doing 3 pitches instead of 2 for the first 95 meters of the climb.
The photo below is me on the top of what we thought was the first pitch. I am at the anchor we should have skipped. Dan took this photo from the ground so I’m not very high up here. The low bolt that marks the start of the climb is quite a bit right of this.


This photo is looking up at part of the first pitch. This section is rated 5.5.
Looking back down the first section of the climb.


The second pitch.
Looking down at the route from the top of Pitch 2.


Bolted anchor at the top of Pitch 2.
The rock is dark here because it is wet. The water made it quite slippery.
Looking up at the start of Pitch 3. This pitch is graded 5.6.


Dan is at the top of Pitch3, bringing me up.
It is a bit of a crowded belay spot but enough space to stack the rope.
Looking up at the start of Pitch 4. You can see I was a bit nervous and chose to place a lot of gear.
I regretted that higher up as I ran low on gear and had to ration it for the last 15 meters or so. Fortunately I had enough to protect the spicier sections.
This pitch was tough for me as a new trad leader. Often my right foot was not on a good hold but just smearing. The gear placements took some time for me and my legs started shaking a couple of times as I placed gear.


Looking down the third pitch. Views of the Bow Valley are really beautiful from this route.
This is looking up at the start of Pitch 5.
It’s a bit easier than Pitch 4 and shorter.


This is the top of Pitch 5. Dan is bringing me up. The bolted anchor is on the left.

This is me at the top of Pitch 5. I am smiling because Dan asked if he could lead again and take Pitch 6, the final pitch, instead of alternating leads. He felt that Pitch 5 wasn’t much of a lead and he wanted more.
I quickly agreed because I knew Pitch 6 was another tough one and my brain was a bit fried from leading Pitch 4. While Dan led, I would get to sit back, belay and then finish the route on second. The tough part was over for me.

But not for Dan. This was his toughest lead of the day.
Here looking up at the start of Pitch 6.
This climb is named for the snail fossils embedded in the rock. Most of the fossils are on Pitch 6. Here is the obligatory snail fossils photo. My hand for scale.


This is the top of Pitch 6 and the end of the climb. There is a bolted anchor in the slab above the ledge.
Our gear is cleaned off already. I was so excited that we were at the top, I almost forgot to take a photo.
From the ledge at the top of Pitch 6, it is an easy walk to the left where there is flat-ish ground to sit and put gear away. From there, a walk up to the right takes you to the start of the descent.

The Descent
Just because the climbing is done, doesn’t mean the adventure stops.
The descent follows the ridge back down but getting back to the big cairn, where we left the ridge on the way up, wasn’t exactly a cruise. We knew we had to do two rappels to get down a steep section of cliff along the ridge.

Fortunately, the top of the first rappel was not too hard to find. Dan is getting set up. The two bolts are in the rock in front of him.
This station is not far down the ridge from the top of the climb. Cairns help make it visible from the trail.
The second station is not too tough to find. Stay on the ridge crest without going too far left or right. The second rappel is long, even with a 70-meter rope. Make sure to knot the ends!
After the rappels, there is still work to do. Here I downclimb a steep gully.


Down at the bottom of a rocky step. That’s one done. How many more to go to get back to the highway? I lost count. At this point, I am eager to get back to the big cairn and familiar ground.
Once you arrive at the big cairn, it is simply a matter of retracing your steps down the ridge and back to the highway.
Challenges
The biggest challenge for us on this route was the difficulty of the climbing. At a grade of 5.7, we thought the climbing would be pretty straightforward. We climb a lot harder than this at the crag. My onsight level is the mid 5.10’s and Dan is stronger than me.
Part of the challenge was the style of climbing. You really have to be comfortable with slab climbing, smearing one or both feet and then putting all your weight on them while high above your last piece of gear.
Dan used some of the crack climbing techniques we practiced in Joshua Tree in the spring.
I also found the gear placement was less frequent and less straightforward than on Mother’s Day. I’m not sure why but I struggled to choose the right piece of gear and often had to try two or three different pieces before I found the right one.
Screw Ups
I like to analyze each climb and consider what went well, what could have gone better and what were issues that should have been avoided. There was just one minor issue on this climb.
We should not have stopped at the first bolted anchor. We should have kept going. Not a serious mistake but it did add an extra transition which adds time.
Speaking of time, we both felt it took us a long time to complete this route. We were over 12 hours from the time we left the car to the time we returned. Everything seemed to take longer than it should. The approach, the set up, the climbing, the transitions and the downclimbing. That being said, we weren’t focused on being quick or even on being efficient for this climb.
Time Budget
I like to do a “time budget” for every route before we head out. Then after the climb, I compare our actual times to my budget. I guess part of me will always be an accountant.
I had budgeted 2 hours for the approach (we were 2.5 hours plus half an hour to eat and set up at the bottom of the climb).
At this stage of our trad careers, I budget 1 hour per pitch of climbing. We will get quicker with practice but I don’t want to rush right now. I want to take time and do everything right as we climb. We ended up taking 7 hours for a six-pitch climb, partly because we stopped at the extra anchor and ended up doing this as 7 pitches instead of 6. But also because the climbing was challenging and we took our time with it.
Finally, the descent took us over 2 hours. With two rappels and some strenuous downclimbing, we moved slowly after such a long day already. The descent was not a “gimmie” and we wanted to move carefully. Safety first!
Final Thoughts
We had a long, tough day out but in the end, it felt so satisfying to complete this route.
There were times I thought maybe we had bitten off a bit too much. But I was pleased with how we took our time, made good decisions and prioritized safety.
I’m not in a hurry to go back and do it again. Maybe after I’ve had a lot more practice placing gear and climbing slab, it will be more relaxed and enjoyable.
For our next trad multi-pitch, we’re definitely going to stick with moderate grades and not too many pitches. We will also try to find another one with bolted anchors. We need to get a lot more efficient before we take on longer climbs and build our own anchors. There’s always something to work on and improve.
To be notified by e-mail when I post my next Trip Report hit the subscribe button on the bottom right of your screen.
If you’ve climbed Escargot Corner, I would love to hear about your experience. Please write me a comment below. If you have suggestions about other moderate trad climbs in the Rockies, I’d love to hear them. We want to continue practicing and improving.

Life is better
on the rocks
Leave a Reply