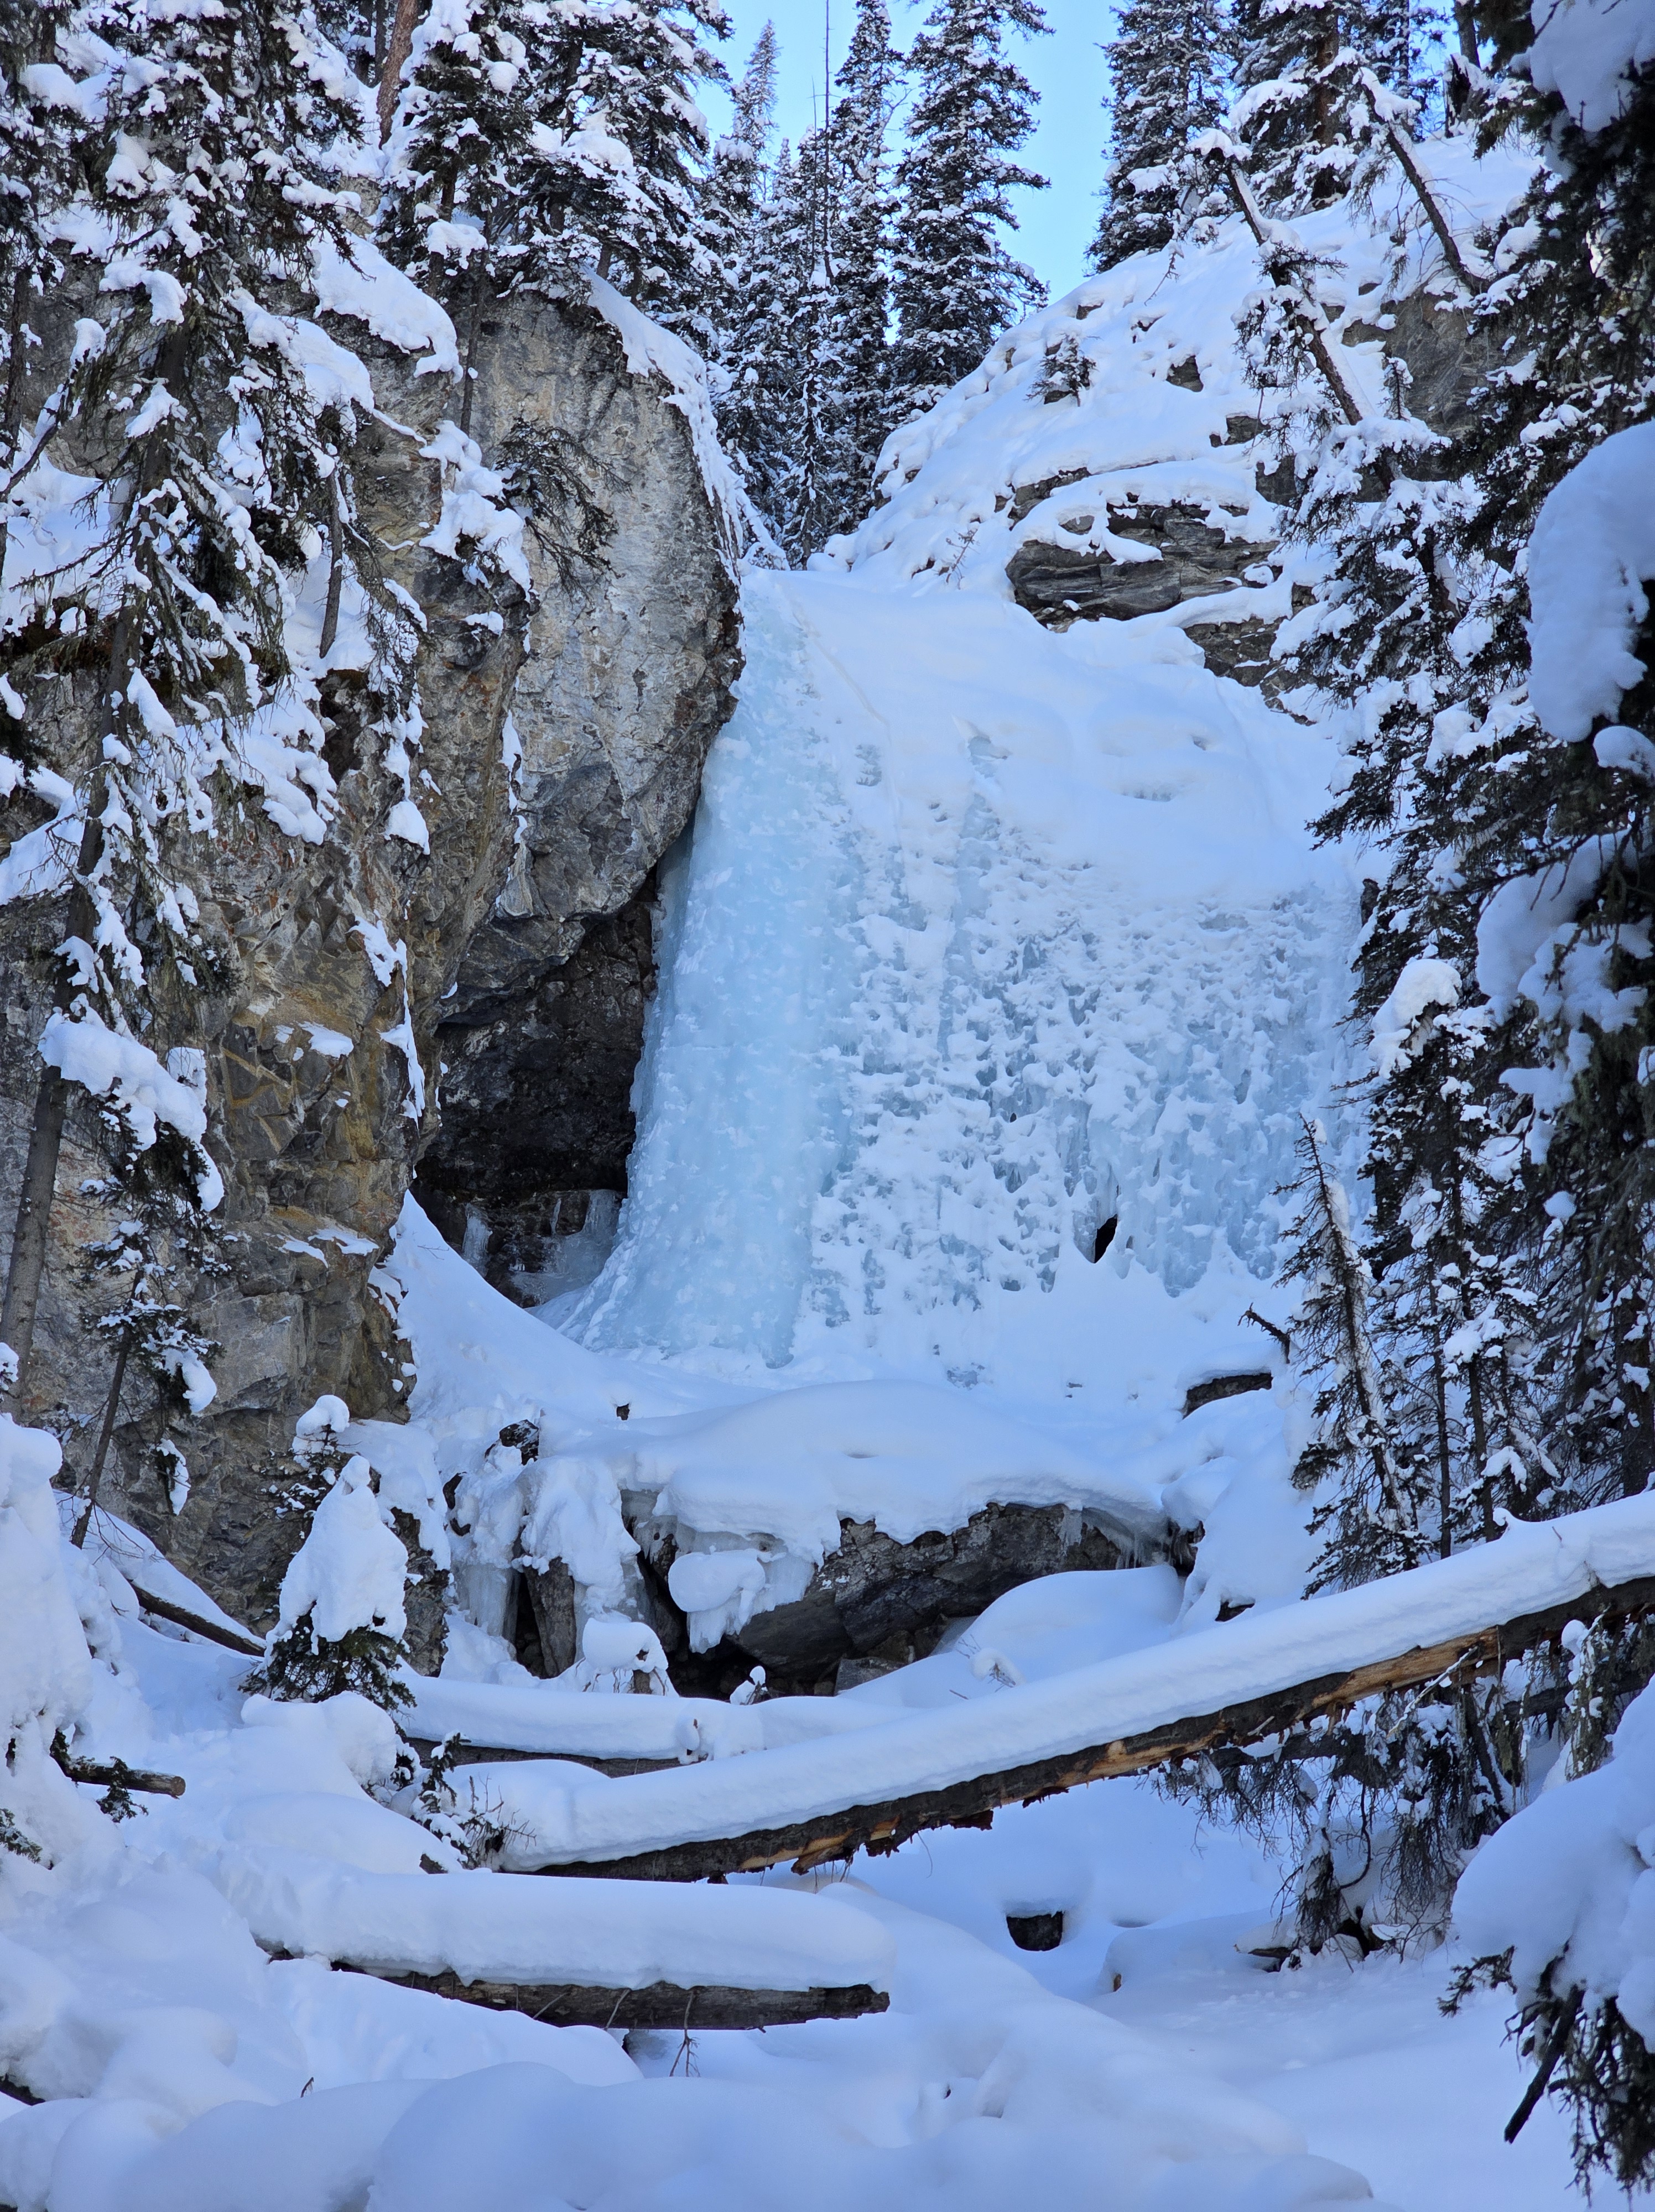
Blue Cheese ice climb is a single-pitch, wide curtain of WI3 lines with a fairly easy approach. There are two bolts at the top with rappel rings which make it easy to set up a top rope anchor. On March 8, 2024, we climbed Blue Cheese for the third time.
Beta:
- you can walk around on the left side of the ice and access the bolts for a top rope anchor
- WI3
- single pitch
- the wide curtain allows for many different lines
- can typically accommodate two parties (two ropes)
- the approach is 3 km the way we like to go in
- there is another, more direct approach route but we found it took longer, see below
- one rope is sufficient
Here is how the ice looked the last time we climbed it, on December 7, 2022:

It was a lot thicker and less steep that year. It was also very wet and I remember my gloves were soaked. This year, it was completely dry.
Interestingly, when we arrived at the ice this year, Dan commented on how you can usually hear the water running behind the ice but this year, we didn’t hear it. Sometimes you can even see the water running behind the ice curtain. This year, however, there was no water there:

Dan took this photo from behind the ice curtain. I am at the entrance. It is completely dry. Fascinating how the ice can change from year to year.
This was how Blue Cheese looked on January 2, 2021. It is less full on the right side.

Access
Drive south from Canmore on the Smith-Dorrien/Spray Lakes Trail. When you come to the dam at the north end of Goat Pond, cross the bridge and then pull into the parking area on the left.
The map below shows our route in bright green, recorded on my FATMAP app. The green dot is the parking.

The Approach
Hike back across the bridge and down the road to the dam. The gate for this road is usually closed to vehicles. Hike across the dam to the trees where you come to the High Rockies Trail.

Turn right and follow this trail. It is a wide trail used by cross-country skiers in the winter. The trail rolls gently first uphill as you hike away from the dam, then down hill.
When it starts back uphill again, start looking for a piece of orange flagging tape tied to a tree on the left.
You may have to zoom in to see the flagging tape in this photo. It is partially hidden by snow. It is tied to the small tree in the middle. The trail goes in to the trees on the right side of the tree with the flagging tape. You will see more flagging tape as you go in. Typically, it is a well-travelled trail but there was a lot of fresh snow the day this photo was taken and we had to break trail.


The trail follows the dry creek bed up towards the ice, staying on the right side of the creek. When you are close to the ice, you cross the creek to the left side.
Here a fixed line is tied to bolts in the rock wall, making it easier to scramble up to the flat area at the base of the climb.


Once you are at the top of this section, there is a large flat area to put on crampons and get set up for climbing.
Alternate Approach
If you scroll back up to the map, you can see that it is possible to park along road (the grey line that runs along the bottom of the photo) directly across from the ice climb. Rather than hiking across the dam, making a big U, you could walk directly across meadows and through the forest. You could cross the High Rockies Trail at the tree with the flagging tape and join the other approach that I described above.
This route is less distance however, you must cross Goat Creek. When Dan and I were there a few years ago, the creek was too deep to walk across. Rather than hike up and down the creek, looking for a good crossing, we took off our boots, put our bare feet in the snow and stepped into the creek, wading across. Sadly on that day, other folks had come across the dam, made it to the climb first, and there was no room for me and Dan to climb. There’s never a guarantee with ice climbing!
The Climb
The left side of the curtain seems to offer the easiest climbing. The middle is a bit more steep and the right side varies a lot, depending on the year.

There are two bolts with rappel rings at the top on the left side of the creek. You have to hike back a bit from the top of the steep part but you’ll see them as soon as you come over the top.
This is a fun climb with a nice belay area and a straightforward, easy approach. I can see doing this climb at least once every year.

Leave a Reply